Houdini Tips and Tricks — Lighting and Rendering
Files created by Deborah R. Fowler unless otherwise noted.
Contains a hip file to do tiled rendering in Karma both from the GUI (USD render ROP, nearly identical to the Mantra example at the bottom of the page), using USD ROP with HUSK, and — most importantly — with some Python help to make USD work on the renderfarm (intended for single-frame tiling).
This page is populated with Redshift tips as well as general tips. More Karma-specific information can also be seen on my overview page — as I restyle my website I will be working on including them here as well.
- If in Mantra — PBR! Now use Karma.
- If you are rendering water, metal, or anything reflective, make sure you have something to reflect. The env light (dome in Redshift) is a very handy method of adding an environment. Troubleshooting tip: black parts of water, dull-looking metal.
- H18 and up: Solaris has a light mixer and light linker — similar capabilities to the former data tree from Mantra/obj.
-
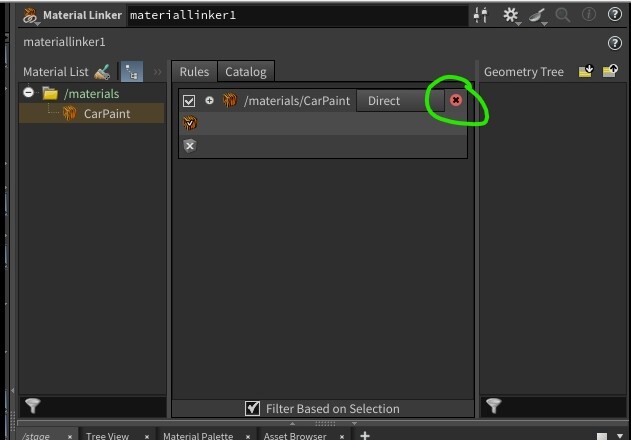
Note in H21: the X button for light linker and material linker does not show up on float, but you can still delete a material by clicking in the same space. This screenshot is from 20.5:
- In Mantra, every object container had masks for refractions/reflections etc. which can come in handy (this is true for Redshift as well — look under the Trace Sets tab). In Karma this is now handled with a geometry property.
-
Example File testbake2.hipncSimple Baker — promote attribute of Cd to vertex after paint and apply simple baker.
-
NOTE: To get the SideFX Labs shelf tools, select them from Extra Shelf Tools, update, then restart Houdini.

- Fog — odforce forum thread — also see the example below.
-
God Rays and Volumetric Lighting
Ignore posts about the atmosphere node and shop shader (deprecated). Moving forward you can use similar techniques in Mantra — use the volume shader with a directional light and make sure you check Enable Lighting and add it to the Volume group on the light node.
In Redshift, go to your ROP node and under Redshift / Advanced / Volume Scatter, click Enable for Volume Scatter. As long as your light has a Contribution value for Volume you will get the god ray (defaults to 1; set to 0 for lights you don't want to contribute). In the sample file it is set to 2 just to show the controls.
When rendering volumes, to create a Redshift volumetric shader: create an RS Material Builder, delete the surface shader, tab-create an RS Volume, plug it into Volume — done.
-
Motion Blur
- Mantra — check Allow Motion Blur in the Mantra node. Also change your geometry object to have Geometry Velocity Blur on. To add motion_vector as an extra image plane, modify the shader on your object to include this information using the VOP node getblurP and turn off Allow Image Motion Blur.
- Karma — follows the same principles as Mantra.
- Redshift — see section here.
- NOTE: if using velocity blur you can control the amount of blur — see motion blur on the troubleshooting page.
- Quality and Speed (Mantra) — SideFX docs
- Rendering using Takes — useful, but be mindful of which take you are in.
-
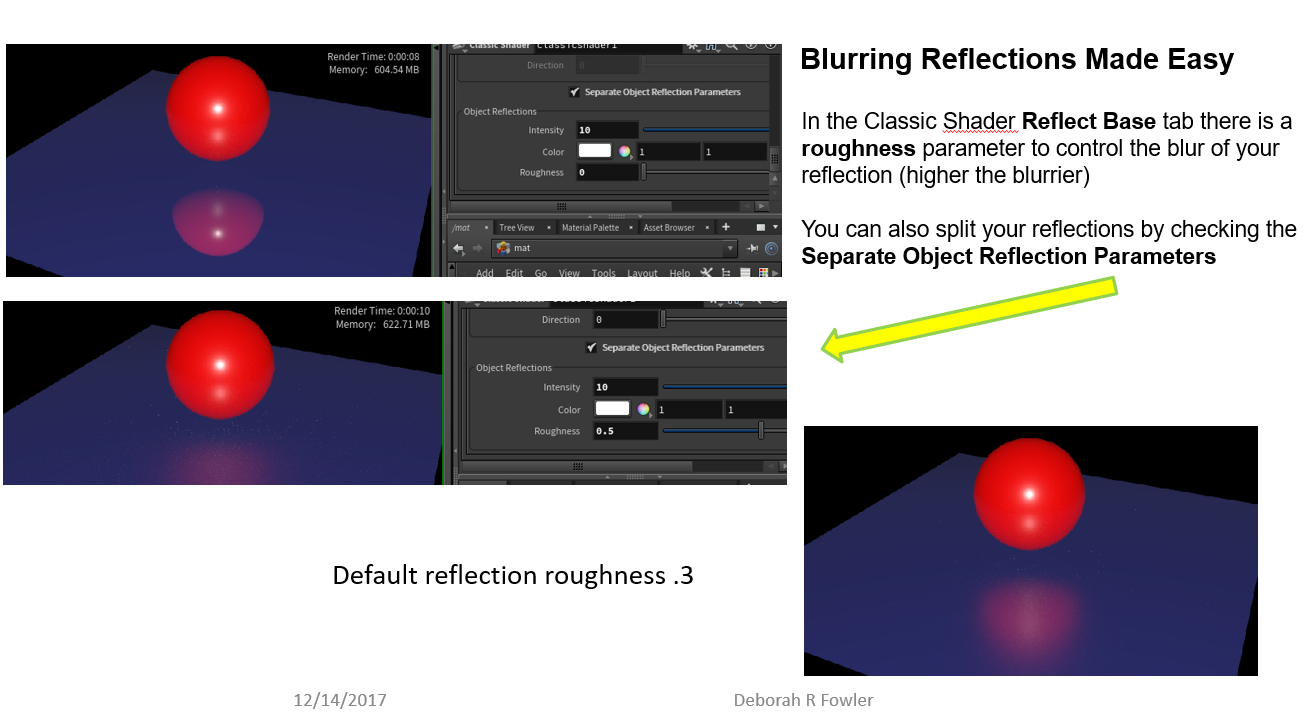
Example File blurReflections.hipncReflections — how to blur in Mantra
-
Example File nullForCameraRotate.hipncRotating a Camera — wire it to a null node and rotate the null instead.
-
Example File bulletColorOverrideRS.hiplcColor Variation — Redshift with bullet solver
-
Example File TextureOverrideH19.zip (Mantra)Example File TextureOverrideH19Redshift.zip (H19.5)Texture Override — hipnc and sample textures with variation.


The key with texture overrides in Redshift is to ensure you have the correct settings on your geo (obj) container.
Also at youtube.com — Texture Override walkthrough.
For Karma, see Texture Overrides in Karma.
-
Example File gridImage.hipncTextures — brief introduction to simple UV-ing.
-
Example File usingGroupForCubeFaces.hipncTextures — using groups to UV separate faces.
- Grouping is an extremely versatile method.
- Tip: Use a single material node with multiple groups.
-
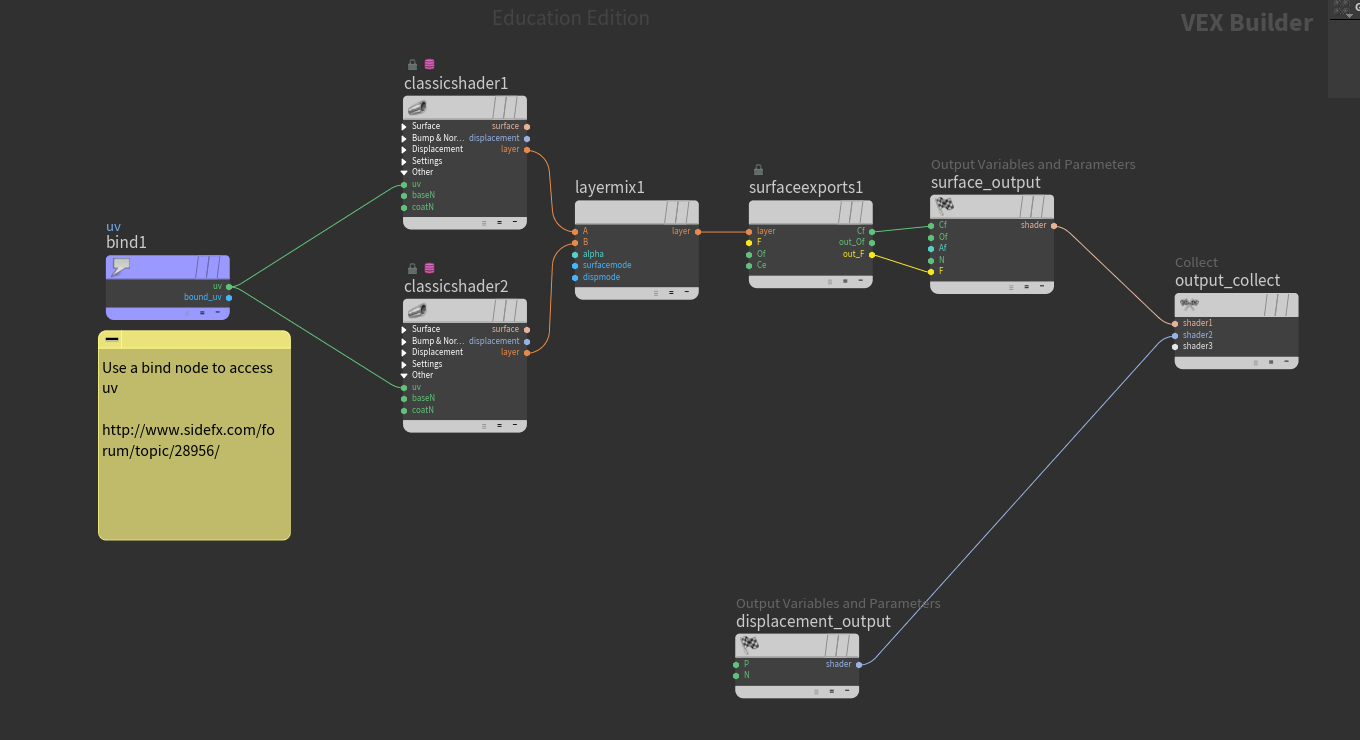
Example File exampleLayeredTextureH17.hipncLayered Textures (layered materials with UV bind) — network view here.
-
Example File TiledRender.zipTiled Render — instructions for use on the renderfarm for tiling a still image (Mantra — no easy equivalent in Redshift; read Toadstorm's blog). For Karma see top of page.