Deborah R. Fowler
Introduction to Python in Houdini
Dailies due on Class 15
Dailies/FirstnameHoudiniSnowman
On Class 15 you will be presenting your hipnc files and jpg to me during studio time. They should be in your Dailies/FirstnameHoudiniSnowman folder as well.
This is to ensure you have used Houdini and are able to render. Monday we will go into more details regarding the script you will be creating (Algorithm due Class 16, code due Class 17).
Variations
Dailies/FirstnameHoudiniSnowman
- FirstnameHoudiniSnowman.hipnc
- FirstnameHoudiniSnowman.jpg
On Class 15 you will be presenting your hipnc files and jpg to me during studio time. They should be in your Dailies/FirstnameHoudiniSnowman folder as well.
This is to ensure you have used Houdini and are able to render. Monday we will go into more details regarding the script you will be creating (Algorithm due Class 16, code due Class 17).
- tips for Exercise 4 parsing your data files to get ready for Houdini (but not using Houdini yet)
- building a snowman in Houdini
Last day (class 12) we introduced Houdini. Today we will continue our discussion by introducing a snowman in python. IF YOU WORK AT HOME BE SURE TO MATCH TO THE SAME VERSION WE ARE USING
see instructions hereWe are going to build the snowman by copying correctly sized spheres onto points. The steps are as follows:
- Create a geo node, dive inside (double click) and create a python node. (To create nodes use the tab menu)
- Start by creating a point
-
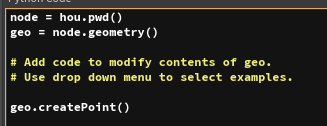
geo.createPoint() - This calls the function to create a point, but if you want to add properties or attributes to that point, you will need to use the value the function returns
-
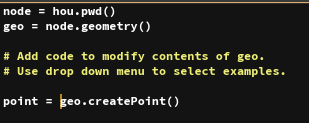
point = geo.createPoint() - Now you have a variable name that can be used to reference the point
-
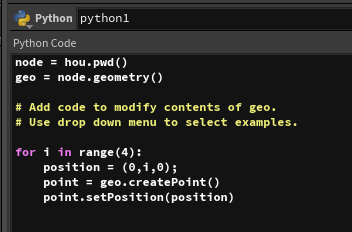
- Next we want to create multiple points so we will create a loop. Houdini will store the information that we add each time.
-
- Take a look at the Geometry Spreadsheet - you will see the point numbers with their locations
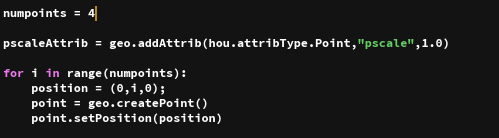
- Next get rid of the "magic numbers" - add numpoints variable to control the number of points and then add an attribute called pscale
-
- The pscale value will be set in the loop so that the spheres will scale to that size
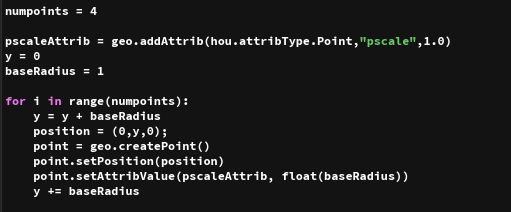
- The position is set based on the radius and the starting position of the sphere. The code below gives us a stack of equally sized spheres
-
- Next add the line to manipulate the radius, baseRadius *= .8, and you have the code given below
-
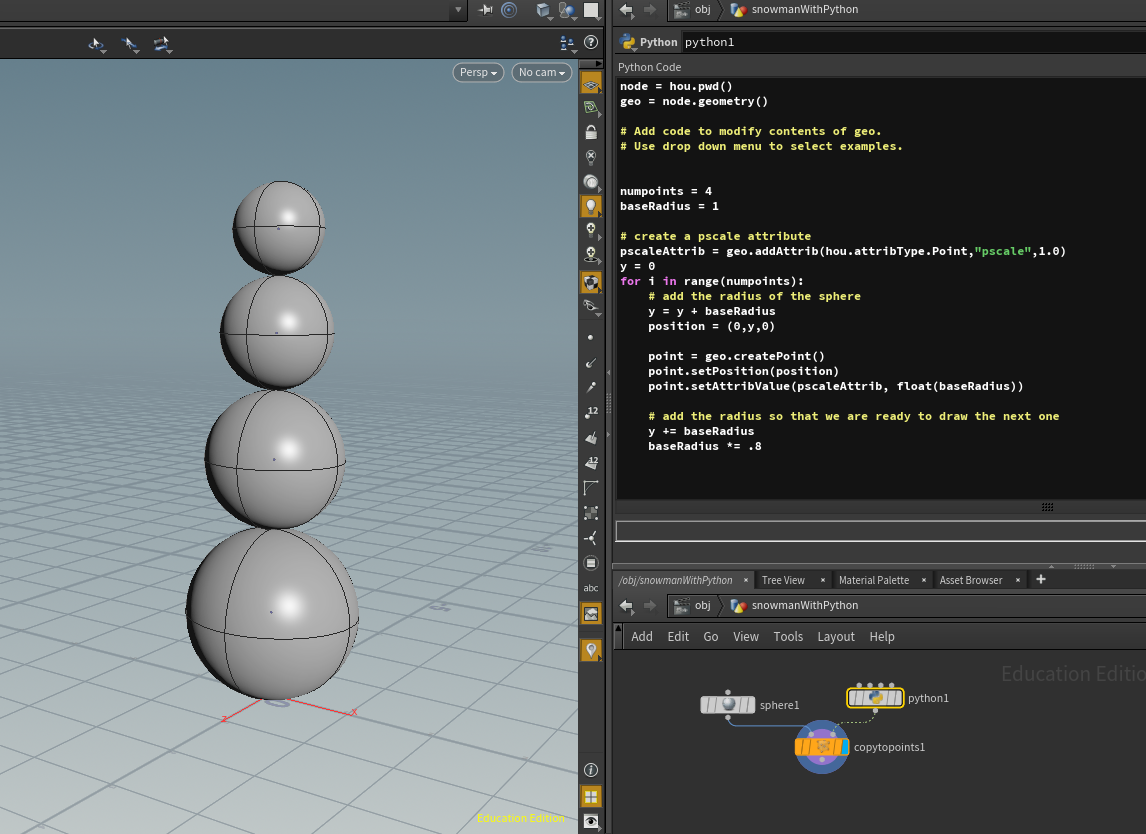
Variations
Rather than have the sphere centered on the origin, what if it were on the ground plane? How about parameters? How about making this a function?
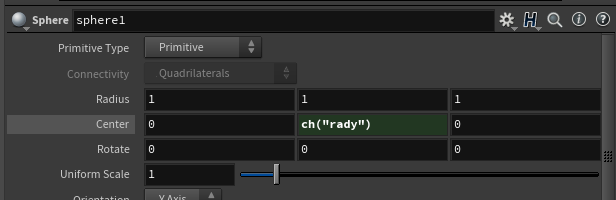
- A very common thing to do in Houdini is to set an object so that it stays on the ground plane. For example, the sphere below is on the grid by referencing the parameter rady and translating it up that value. In this way, no matter what the size of the sphere, it will sit on the groundplane. So the expression in ty (Center's parameter) is set to ch("rady"), which is the value of the radius in the y direction
-
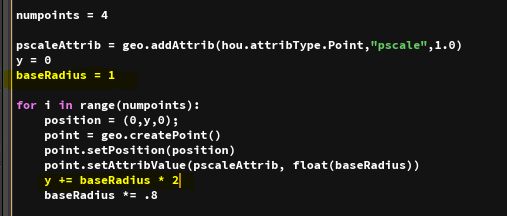
- This requires some changes to our code since the first sphere is already sitting on the grid, we do not need to move it. The next sphere will be the diameter of the previous spheres
-
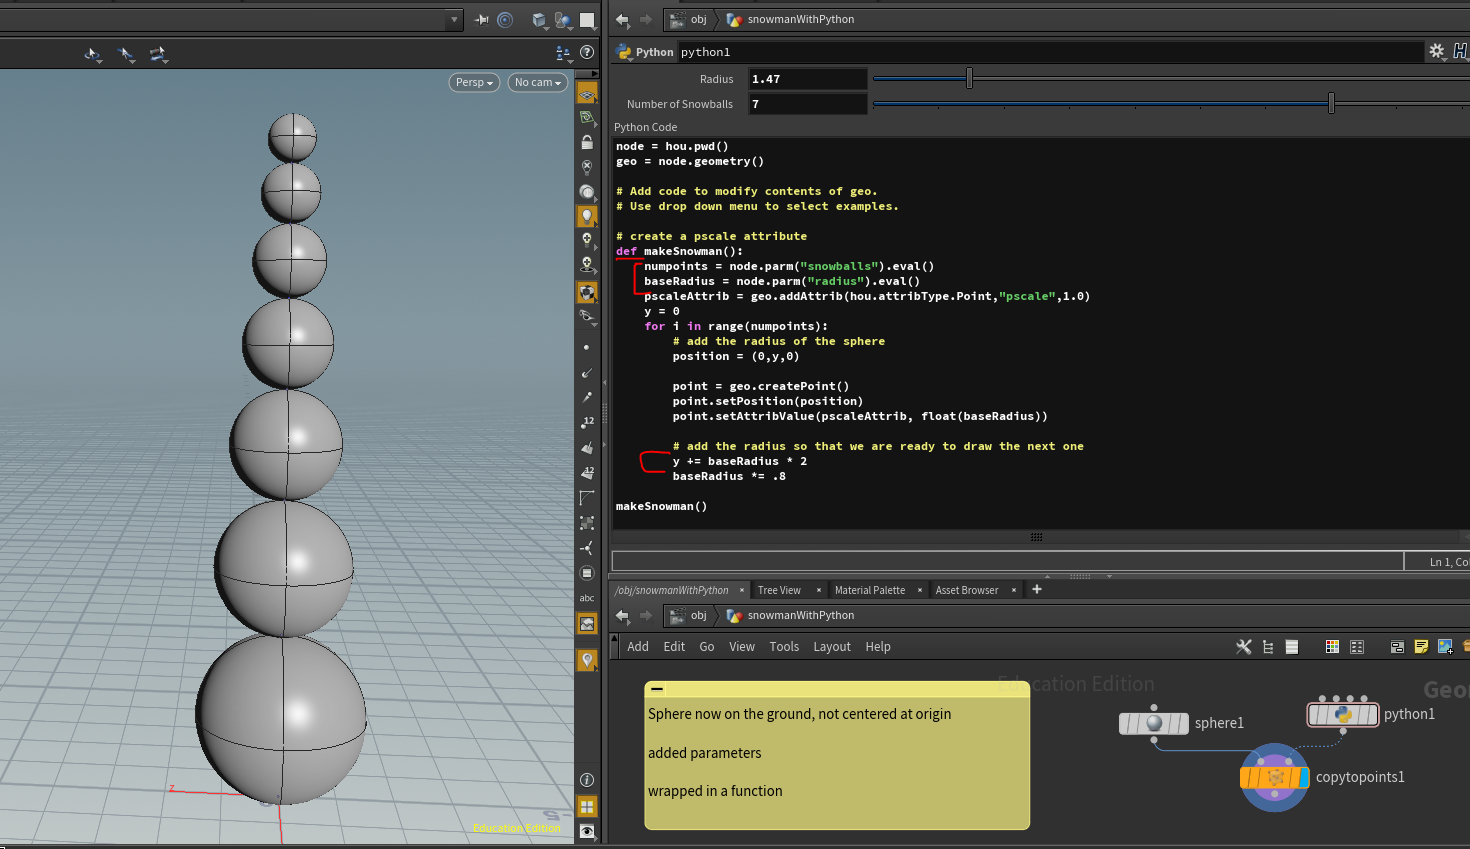
- Finally, user defined parameters are added so that we have a tool we could use to allow arbitrary amounts of snowballs and adjustable radius. User defined parameters are added using the parameter dialog box and then are evaluated as seen below. Then the code is wrapped in a function and called.
-